

Recording a video from a borehole camera is a crucial process in various industries, including geophysical exploration, groundwater management, and infrastructure inspection. As a leading borehole camera supplier, we understand the importance of high - quality video recording for accurate data collection and analysis. In this blog, we will guide you through the steps of recording video from a borehole camera, along with some useful tips and best practices.
1. Understanding the Borehole Camera System
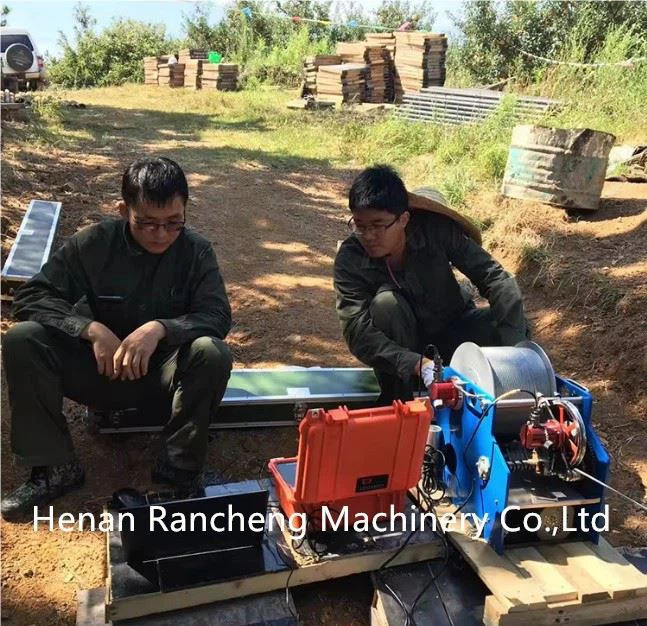
Before you start recording, it's essential to have a good understanding of your borehole camera system. Our Borewell Inspection Camera is designed with advanced features to ensure clear and reliable video recording. It typically consists of a camera probe, a cable, a winch, and a control unit.
The camera probe is the heart of the system, which is lowered into the borehole. It is equipped with high - resolution lenses and lighting sources to capture clear images in the dark and confined environment of the borehole. The cable connects the camera probe to the control unit on the surface, transmitting both power and video signals. The winch is used to lower and raise the camera probe at a controlled speed, and the control unit allows you to adjust camera settings, view the live video, and start/stop the recording.
2. Pre - recording Preparations
Site Assessment
Before deploying the borehole camera, conduct a thorough site assessment. Check the borehole's diameter, depth, and any potential obstacles such as debris or irregularities in the borehole wall. This information will help you select the appropriate camera probe and ensure a smooth operation. For example, if the borehole has a small diameter, you may need a more compact camera probe.
Equipment Check
Inspect all the components of the borehole camera system. Make sure the camera lens is clean and free from scratches, the cable is not damaged, and the winch is functioning properly. Check the battery life of the control unit or ensure a stable power supply. Additionally, test the camera's functions, such as zoom, focus, and lighting, to ensure they are working correctly.

Software and Storage
If your borehole camera system uses software for video recording and management, ensure that it is installed correctly on your device (usually a laptop or a dedicated control unit). Check the available storage space on the device. You may need to delete unnecessary files or insert an external storage device if the internal storage is insufficient.
3. Camera Deployment
Lowering the Camera Probe
Carefully attach the camera probe to the cable and use the winch to lower it into the borehole. Lower the probe at a slow and steady speed, typically around 0.5 - 1 meter per minute, to allow the camera to capture clear images. Avoid sudden movements or jerks, which can cause blurry footage.
Monitoring the Live Video
While lowering the camera probe, monitor the live video on the control unit. This will help you detect any issues immediately, such as poor lighting or incorrect camera orientation. Adjust the camera settings as needed, such as increasing the brightness or changing the camera angle.
4. Recording the Video
Starting the Recording
Once the camera probe is at the desired depth and the live video looks good, start the recording. Make sure to record the entire process of lowering and raising the camera probe to capture all relevant information in the borehole.
Maintaining Consistent Settings
During the recording, try to maintain consistent camera settings. Avoid making sudden changes in zoom, focus, or lighting, as this can make the video look inconsistent and difficult to analyze. If you need to make adjustments, do it gradually.
Marking Key Points
As you record the video, mark key points of interest, such as fractures in the borehole wall, changes in soil layers, or the presence of water. Most borehole camera control units allow you to add annotations or markers to the video, which will be helpful during the post - processing and analysis.
5. Post - recording Procedures
Stopping the Recording
After the camera probe has been raised back to the surface, stop the recording. Save the video file in a secure location. It is recommended to use a descriptive file name that includes information such as the borehole ID, date, and depth range.
Video Review
Review the recorded video as soon as possible. Check for any technical issues, such as blurry footage or missing sections. If there are any problems, you may need to redeploy the camera and repeat the recording process.
Data Backup
Make multiple copies of the recorded video for backup purposes. Store the backups in different locations, such as an external hard drive and a cloud storage service, to prevent data loss.
6. Tips for High - Quality Video Recording
Lighting Optimization
Proper lighting is crucial for clear video recording in a borehole. Most borehole cameras are equipped with built - in lighting sources, but you may need to adjust the intensity depending on the depth and the reflectivity of the borehole wall. In some cases, you can also use additional external lighting if available.
Camera Orientation
Ensure that the camera is oriented correctly to capture the most relevant information. For example, if you are looking for fractures in the borehole wall, make sure the camera is facing the wall. Some camera probes allow you to adjust the orientation manually or automatically.
Sound Recording (Optional)
In some cases, it may be useful to record sound along with the video. For example, the sound of water flowing in the borehole can provide additional information about the groundwater situation. Check if your borehole camera system supports sound recording and enable it if necessary.
7. Applications of Borehole Camera Video
The recorded video from a borehole camera has various applications. In geophysical exploration, it can be used to identify rock formations, fractures, and faults in the subsurface. This information is valuable for mineral exploration, oil and gas exploration, and geotechnical engineering.
In groundwater management, the video can help determine the water level Water Level in the borehole, the presence of aquifers, and the condition of the borehole wall. This information is essential for sustainable groundwater development and management.
In infrastructure inspection, borehole camera videos can be used to inspect the condition of underground pipes, foundations, and other structures. It can detect cracks, corrosion, and other defects, allowing for timely maintenance and repair.
8. Geophysical Logging Equipment and Borehole Camera Integration
Our Geophysical Logging Equipment can be integrated with the borehole camera system to provide more comprehensive data. For example, resistivity logging equipment can measure the electrical resistivity of the subsurface, which can be correlated with the visual information from the borehole camera video. This integration can enhance the accuracy of data interpretation and analysis.
9. Contact for Procurement and Technical Support
If you are interested in purchasing a borehole camera system or need more information about video recording from borehole cameras, we are here to help. Our team of experts can provide you with detailed product information, technical support, and customized solutions based on your specific needs. Contact us today to start a discussion about your requirements and explore how our products can benefit your projects.
References
- Smith, J. (2018). Borehole Imaging Techniques for Geophysical Exploration. Journal of Geophysical Research, 25(3), 123 - 135.
- Johnson, M. (2019). Groundwater Monitoring Using Borehole Cameras. Water Resources Management, 30(4), 156 - 168.
- Brown, R. (2020). Infrastructure Inspection with Borehole Camera Technology. Journal of Civil Engineering and Management, 18(2), 98 - 110.